Compile Less with Grunt
What’s in this topic
The topic describes how to install, configure and use Grunt JavaScript task runner for compiling .less files in Magento 2.
Prerequisites
Make sure that you set your Magento application to the developer or default mode. The default mode sets the Less compilation mode to Server-side Less compilation.
Installing and configuring Grunt
Magento has built-in Grunt tasks configured, but there are still several prerequisite steps you need to take to be able to use it:
-
Install node.js to any location on your machine.
-
Install the Grunt CLI globally:
1
 npm install -g grunt-cli
- Rename the following files in your Magento root directory:
package.json.sampletopackage.jsonGruntfile.js.sampletoGruntfile.js
-
Install (or refresh) the
node.jsproject dependency, including Grunt, for your Magento instance. To do this, run the following commands in a command prompt:1
cd <your_Magento_instance_directory>1
npm install1
npm update
-
Add your theme to Grunt configuration. To do this, in the
dev/tools/grunt/configs/themes.jsfile, add your theme tomodule.exportslike following:1 2 3 4 5 6 7 8 9 10 11 12
module.exports = { <theme>: { area: 'frontend', name: '<Vendor>/<theme>', locale: '<language>', files: [ '<path_to_file1>', //path to root source file '<path_to_file2>' ], dsl: 'less' },
Where the following notation is used:
<theme>: your theme code, conventionally should correspond to the theme directory name.<language>: specified in thecode_subtagformat, for exampleen_US. Only one locale can be specified here. To debug the theme with another locale, create one more theme declaration, having specified another value forlanguage<path_to_file>: path to the root source file, relative to theapp/design/frontend/<Vendor>/<theme>/webdirectory. You need to specify all root source files of the theme. If your theme inherits from a certain theme, and does not contain its own root source files, specify the root source files of the parent theme.
- (Optional) If you want to use Grunt for “watching” changes automatically, without reloading pages in a browser each time, install the LiveReload extension in your browser.
Grunt commands
The following table describes the grunt commands you can use performing different customization tasks. Run all commands from your Magento installation directory.
| Grunt task | Action |
|---|---|
| grunt clean | Removes the theme related static files in the pub/static and var directories. |
| grunt exec | Republishes symlinks to the source files to the pub/static/frontend/ directory. Use grunt exec:<theme> to republish symlinks for a specific theme. |
| grunt less | Compiles CSS files using the symlinks published in the pub/static/frontend/ directory. Use grunt less:<theme> to use the symlinks published for a specific theme. |
| grunt watch | Tracks the changes in the source files, recompiles .css files, and reloads the page in the browser. |
Use cases of tracking changes using Grunt
The following shows which Grunt tasks to use for debugging:
- After you switch the compilation mode from client-side to server-side, run the
execcommand. - After you customize the content of any
.lessfile, except the root source files, run thelesstask and reload the page. - After you customize the root source files or move the files included to the root files, run the
execcommand and reload the page. - After you run the
bin/magento setup:upgradecommand, run theexeccommand. - After you run the
execcommand, run theclearcommand toclearthe Magento cache, then run thewatchcommand. Running the commands in this order will ensure that any custom jQuery attributes like product sliders, banners, etc are loaded correctly.
If you have LiveReload installed, run the grunt watch command, and the flow is even simpler:
- After you customize the content of any
.lessfile, changes are applied and the page reloads automatically. No additional changes are required. - After you customize the root source files or move the files included to the root files, run the
cleanandexeccommands, and the browser page reloads automatically.
CSS source maps
When using Grunt for styles preprocessing, you can enable the CSS source maps generation in your browser. It will make the theme styles debugging easier.
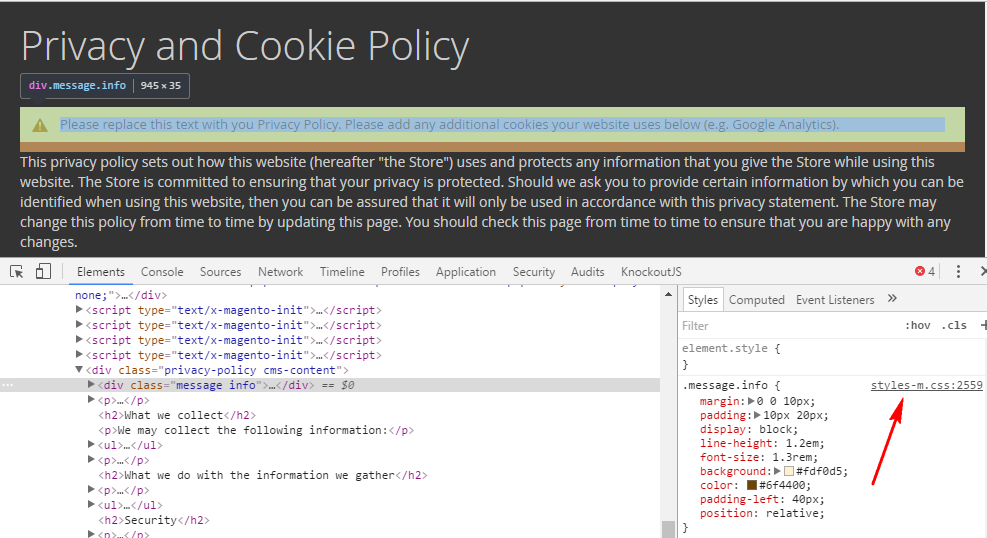
For each theme, Magento compiles all theme .less files into two CSS files: styles-m.css and styles-l.css. So when you debug a theme, you browser only sees styles-m.css and it might be difficult to define which exactly .css or .less file requires corrections. For example:
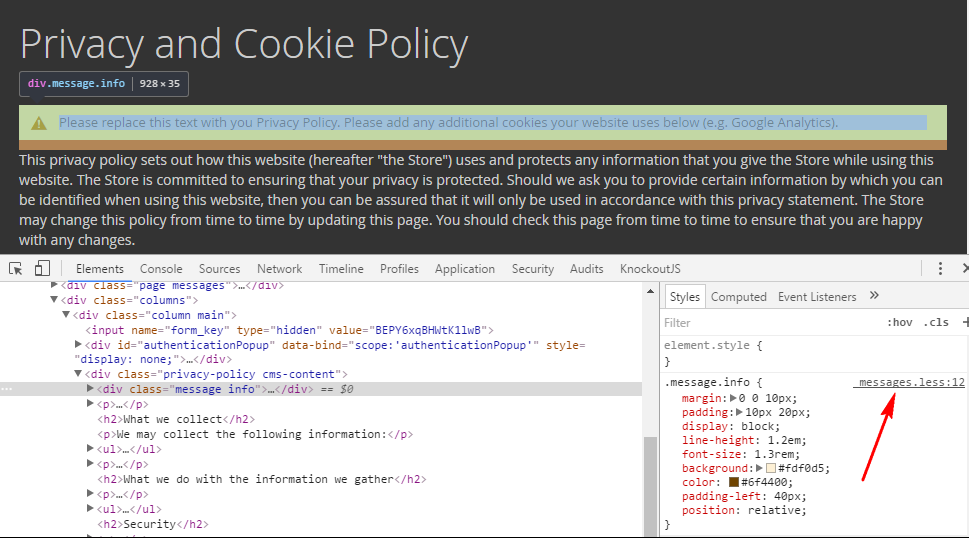
CSS source maps solve this issue. They help to find the .less file, where the style is specified. For example:
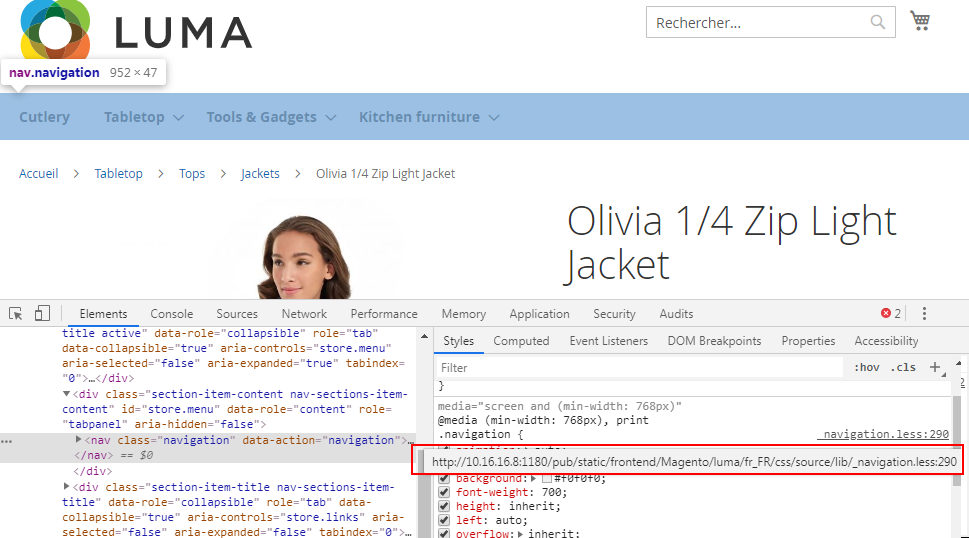
CSS source maps are generated automatically when you compile CSS for your theme using the grunt less: <theme> command. To use them, you need to enable source maps displaying in your browser.
The path to the CSS source maps configuration differs, depending on the browser.
In Google Chrome, to enable source maps generation, go to Inspect > Settings > Preferences > Enable CSS source maps.
Magento has a base set of variables that define commonly used aspects of a theme; such as colors, fonts, style of page titles, and so on.
The <magento-root>/lib/web/css/source/lib/variables directory contains LESS files that define values assigned to variables for many of the common elements in Magento.
To change or override any of these variables, simply create a file in <theme-dir>/web/css/source/_theme.less For example:
1
2
@navigation__background: @secondary__color__light;
@font-family__sans-serif: 'Helvetica Neue', Helvetica, Arial, sans-serif;