RowBuilder widget
The RowBuilder widget allows you to build a container with rows.
The RowBuilder widget can be used only on the frontend area.
The RowBuilder widget source is lib/web/mage/row-builder.js.
Initialize the RowBuilder widget
For information about how to initialize a widget in a JS component or .phtml template, see the Initialize JavaScript topic.
The RowBuilder widget is instantiated with:
1
2
3
4
5
6
7
8
$("#row-builder").rowBuilder({
    "rowTemplate":"#row-template",
    "rowContainer":"#row-container",
    "rowParentElem":"<div></div>",
    "remEventSelector":"a",
    "btnRemoveSelector":".action.remove",
    "maxRows":"5"
});``
Where:
#row-builderis the selector of the element which will be the RowBuilder.
The following example shows a PHTML file using the script:
1
2
3
4
5
6
7
8
9
10
11
12
13
14
15
16
17
<script>
    require([
        'jquery',
        'rowBuilder'
    ], function ($) {
        'use strict';

        $("#row-builder").rowBuilder({
              "rowTemplate":"#row-template",
              "rowContainer":"#row-container",
              "rowParentElem":"<div></div>",
              "remEventSelector":"a",
              "btnRemoveSelector":".action.remove",
              "maxRows":"5"
        });
    });
</script>
The following example shows a PHTML file using the script with some data for a couple of fields:
1
2
3
4
5
6
7
8
9
10
11
12
13
14
15
16
17
18
19
20
21
22
23
24
25
26
27
28
29
30
31
32
33
34
35
36
37
38
39
40
41
42
43
44
45
46
47
48
49
50
51
52
53
54
55
56
57
58
59
60
61
62
63
64
65
66
67
68
69
70
71
72
73
<div class="row-builder-example">
    <div id="max-rows-message" style="display: none;" class="message notice limit" role="alert">
        <span>Number of rows exceeded.</span>
    </div>
    <button type="button" id="add-row-button" class="action add">
        <span>Add Item</span>
    </button>
    <div id="row-container"></div>
</div>

<script id="row-template" type="text/x-magento-template">
    <div>
        <div class="field name required">
            <label for="field1-name<%- data._index_ %>" class="label"><span>Item <%- data._index_ %> Field</span></label>
            <div class="control">
                <input name="field1[name][<%- data._index_ %>]" type="text" title="<?= $block->escapeHtmlAttr(__('Name')) ?>" class="input-text"
                       id="field1-name<%- data._index_ %>"/>
            </div>
        </div>
        <div class="field name required">
            <label for="field2-name<%- data._index_ %>" class="label"><span>Item <%- data._index_ %> Field</span></label>
            <div class="control">
                <input name="field2[name][<%- data._index_ %>]" type="text" title="<?= $block->escapeHtmlAttr(__('Name')) ?>" class="input-text"
                       id="field2-name<%- data._index_ %>"/>
            </div>
        </div>
        <div class="field name required">
            <label for="field3-name<%- data._index_ %>" class="label"><span>Item <%- data._index_ %> Field</span></label>
            <div class="control">
                <input name="field3[name][<%- data._index_ %>]" type="text" title="<?= $block->escapeHtmlAttr(__('Name')) ?>" class="input-text"
                       id="field3-name<%- data._index_ %>"/>
            </div>
        </div>
        <div class="actions-toolbar">
            <div class="secondary">
                <a href="#" id="btn-remove<%- data._index_ %>" class="action remove"
                   title="Remove Item">
                    <span>Remove Item</span>
                </a>
            </div>
        </div>
    </div>
</script>

<script>
    require([
        'jquery',
        'rowBuilder'
    ], function ($) {
        'use strict';

        var data = {
            formData: [
                ["field1-name1", "field2-name1", "field3-name1"],
                ["field1-name2", "field2-name2", "field3-name2"],
                ["field1-name3", "field2-name3", "field3-name3"],
                ["field1-name4", "field2-name4", "field3-name4"],
            ],
            templateFields: [
                "field1-name", "field2-name", "field3-name"
            ]
        };

        $(".row-builder-package-manager").rowBuilder({
            "rowTemplate": "#row-template",
            "rowContainer": "#row-container",
            "rowParentElem": "<div></div>",
            "remEventSelector": "a",
            "btnRemoveSelector": ".action.remove",
            "formDataPost": data
        });
    });
</script>
This is provided during widget instantiation. For example:
1
formDataPost : {"formData": ["field1-name1", "field2-name1", "field3-name1"], "templateFields":['field1-name','field2-name','field3-name']]}
-"formData" is the multi-dimensional array of form field values : [[‘a’,’b’],[‘c’,’b’]] received from the server and encoded
-"templateFields" are the input fields in the template with index suffixed after the field name. For example, field1-name{index}, field2-name{index}, field3-name{index}
Options
The PopupWindow widget has the following options:
- rowTemplate
- rowContainer
- rowIndex
- rowCount
- rowParentElem
- rowContainerClass
- addRowBtn
- btnRemoveIdPrefix
- btnRemoveSelector
- rowIdPrefix
- additionalRowClass
- addEventSelector
- remEventSelector
- hideFirstRowAddSeparator
- maxRows
- maxRowsMsg
rowTemplate
The row template selector.
Type: String
Default value: '#template-registrant'
rowContainer
The row container selector.
Type: String
Default value: '#registrant-container'
rowIndex
Row index used by the template rows.
Type: Integer
Default value: 0
rowCount
Row count.
Type: Integer
Default value: 0
rowParentElem
Row parent element.
Type: String
Default value: '<li></li>'
rowContainerClass
Row container class.
Type: String
Default value: 'fields'
addRowBtn
The add row button selector.
Type: String
Default value: '#add-registrant-button'
btnRemoveIdPrefix
ID prefix of a remove button.
Type: String
Default value: 'btn-remove'
btnRemoveSelector
The remove button selector.
Type: String
Default value: '.btn-remove'
rowIdPrefix
ID prefix of a row element.
Type: String
Default value: 'row'
additionalRowClass
The additional row class name which is added after the main class name.
Type: String
Default value: 'add-row'
addEventSelector
Default selectors for adding elements to a template.
Type: String
Default value: 'button'
remEventSelector
Default selectors for removing markup elements from a template.
Type: String
Default value: 'a'
hideFirstRowAddSeparator
This option specifies if the remove link and additional row class are removed for the first row.
Type: Boolean
Default value: true
maxRows
Max number of rows.
Type: Integer
Default value: 1000
maxRowsMsg
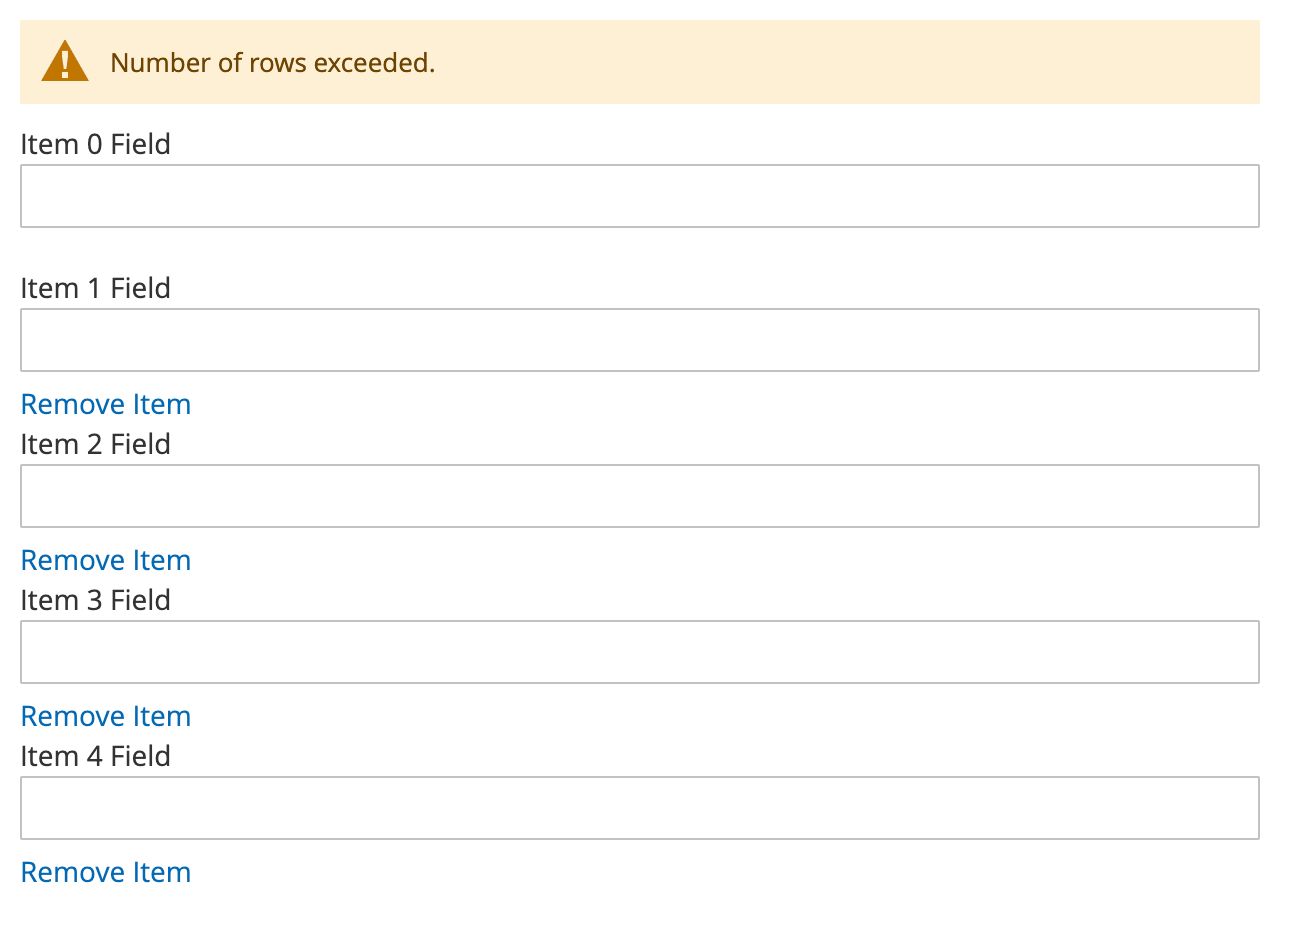
The message selector of an element which appears when the max number of rows has been exceeded.
Type: String
Default value: #max-registrant-message
Code sample
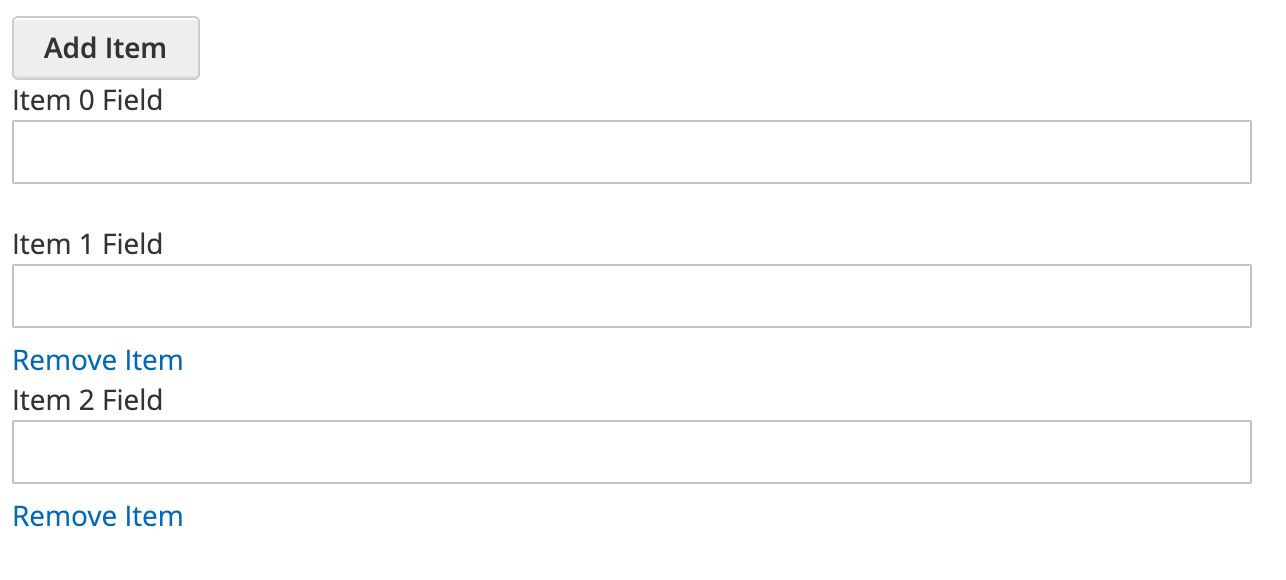
This example shows the row builder container, which adds a new row when you click the Add Item button and removes a row when you click the Remove Item button.
1
2
3
4
5
6
7
8
9
10
11
12
13
14
15
16
17
18
19
20
21
22
23
24
25
26
27
28
29
30
31
32
33
34
35
36
37
38
39
40
41
42
<script id="row-template" type="text/x-magento-template">
    <div>
        <div class="field name required">
            <label for="field-name<%- data._index_ %>" class="label"><span>Item <%- data._index_ %> Field</span></label>
            <div class="control">
                <input name="field[name][<%- data._index_ %>]" type="text" title="<?= $block->escapeHtmlAttr(__('Name')) ?>" class="input-text"
                       id="field-name<%- data._index_ %>"/>
            </div>
        </div>
        <div class="actions-toolbar">
            <div class="secondary">
                <a href="#" id="btn-remove<%- data._index_ %>" class="action remove"
                   title="Remove Item">
                    <span>Remove Item</span>
                </a>
            </div>
        </div>
    </div>
</script>

<div class="row-builder-example"
     data-mage-init='{
        "rowBuilder":{
            "rowTemplate":"#row-template",
            "rowContainer":"#row-container",
            "rowParentElem":"<div></div>",
            "remEventSelector":"a",
            "btnRemoveSelector":".action.remove",
            "maxRows":"5",
            "maxRowsMsg":"#max-rows-message",
            "addRowBtn":"#add-row-button",
            "additionalRowClass":"additional"
        }
     }'>
    <div id="max-rows-message" style="display: none;" class="message notice limit" role="alert">
        <span>Number of rows exceeded.</span>
    </div>
    <button type="button" id="add-row-button" class="action add">
        <span>Add Item</span>
    </button>
    <div id="row-container"></div>
</div>
Result
As a result, we see the RowBuilder widget example with 5 rows as max.